
Its perfect sunny Sunday here in Greece and I decided to work on my projects from my yard, staring at the sea :)
I almost finished my Gatefold mini album and now I am in the process of making embellishments. As mentioned before, Europe is the worst location for finding scrapbook supplies, so, many of my embellishments I am making myself.
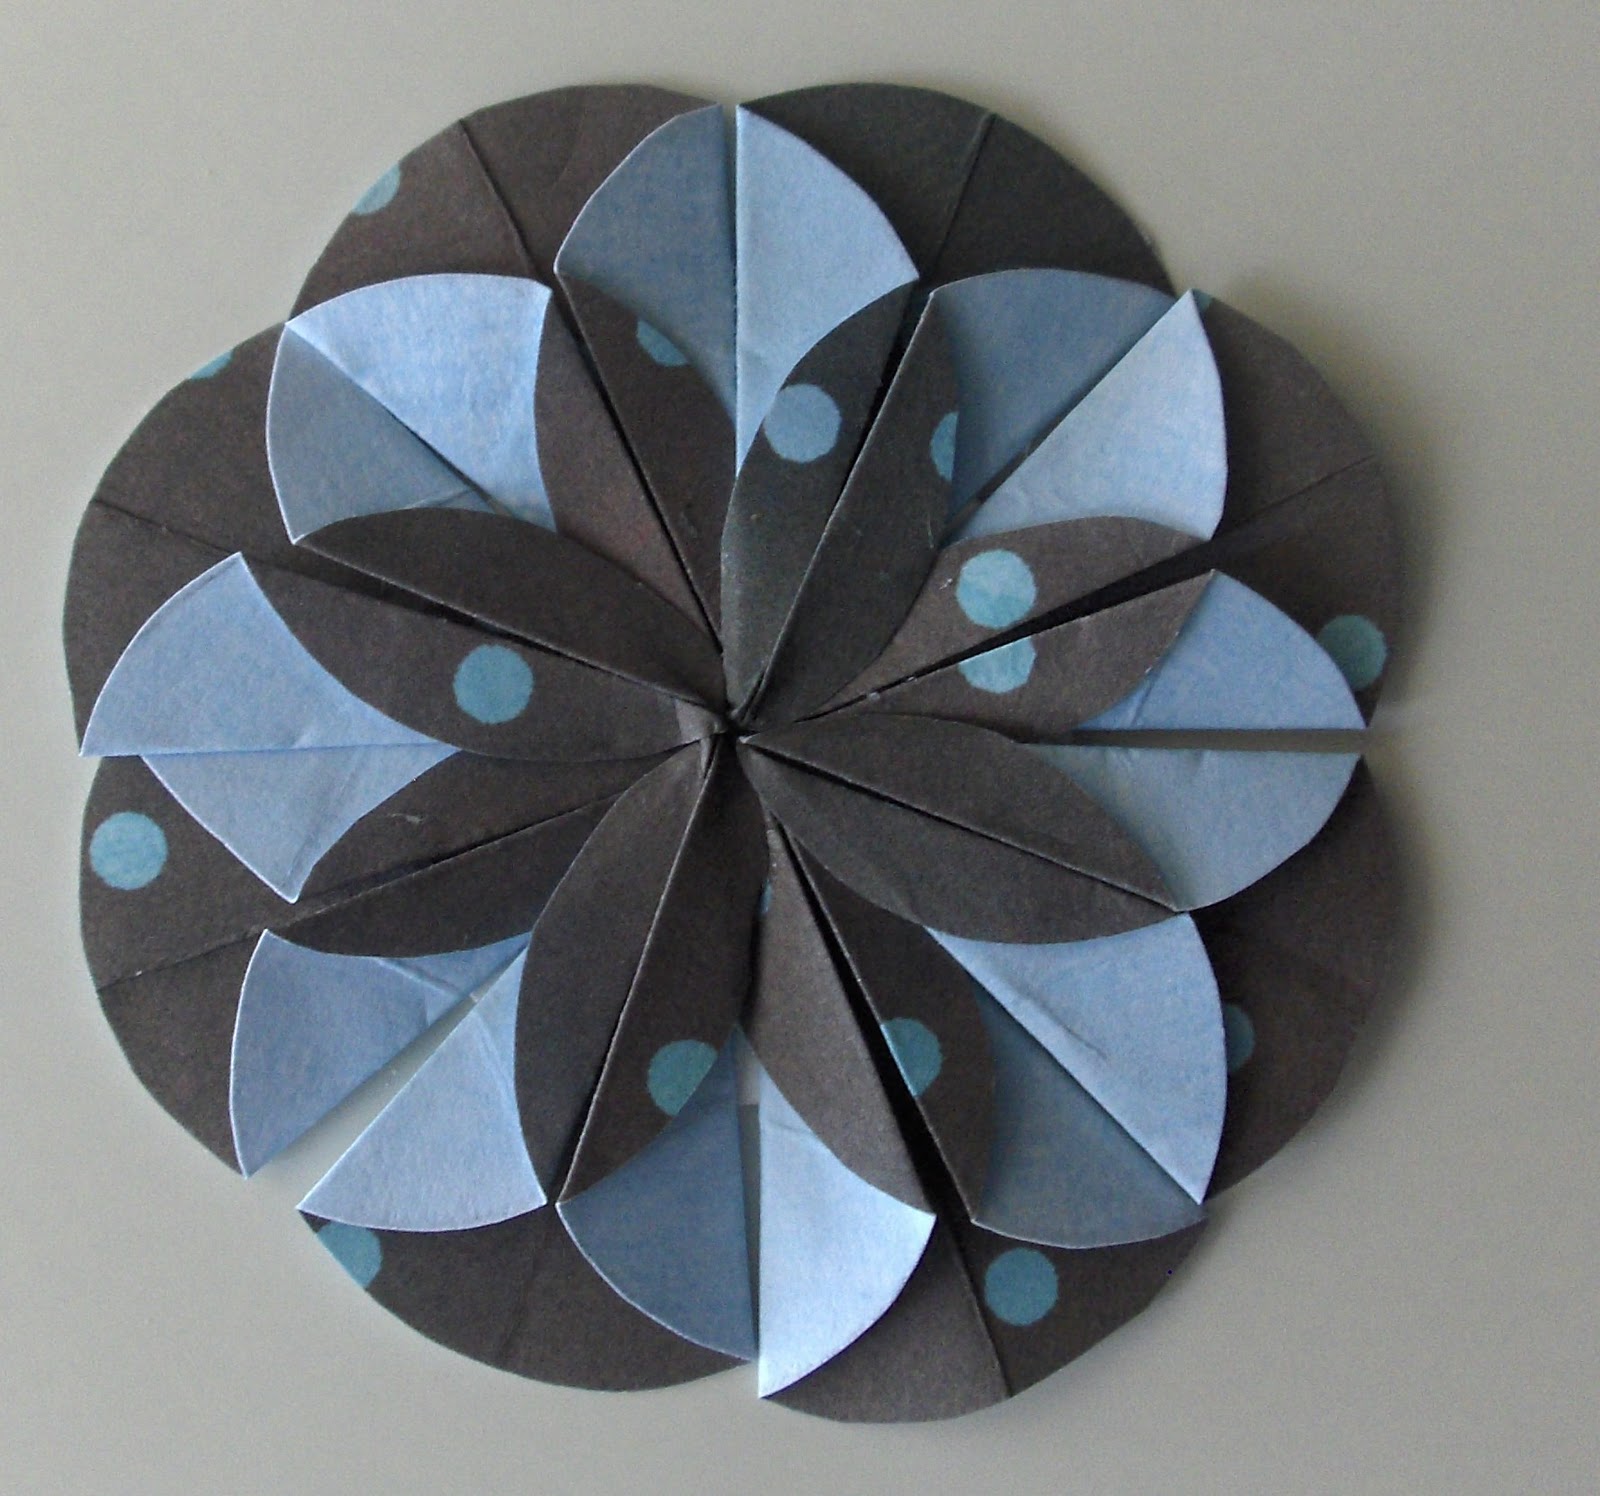
One of my favorite paper flowers is Dahlia, so today I am going to do a little photo tutorial how to make these great flowers.
Its really fast & easy, I learned how to make these in my elementary school for some crafty competition.
So here we go:
You will need:
8 PUNCHED CIRCLES {double sided paper}
1 PUNCHED CARD STOCK CIRCLE { for the base}

Fold all your circles in half. Do the same with the card stock.

STEP 2:
Fold all your circles again in half. This will give you 4 x 1/4

STEP 3:
Unfold your circle.
Fold one side of 1/4. Make sure when you fold one side, that both up and down corner are following the score line (those you made in step 1&2}

STEP 4:
Fold the side of the opposite 1/4.
Also, make sure that both corners are following the scored lines.

STEP 5:
Repeat step 4 for all the other 7 circles.

STEP 6:
Flip over your circle to the other side.

STEP 7:
Fold the one side towards the central line. The side you are folding is the same one you already folded on Step 3 {just on the opposite side}. Make sure that while you are folding, you do not go over the central scored line.

STEP 8:
Fold the other side towards the center, following Step 7 instructions.

STEP 9:
Repeat step 8 for all the other petals.

STEP 10:
Attach the first petal on your card stock. Since you scored your card stock at the beginning, use that score line as a guide to attach the first petal. Make sure that down corner of the petal does not exceed center of your card stock circle.

STEP 11:
Attach the second petal, making sure it is symmetrical with the first one {again following the score line}.

STEP 12:
Attach the 3rd petal on the side {following the horizontal score line you made before}.

STEP 13:
Attach the 4th petal making sure its symmetrical with the 3rd one.

STEP 14:
Attach the last 4 petals on the space left on the card stock.
{please note that I didnt glue petals on the card stock so thats why I have gaps in some places}
STEP 15:
Use some buttons {or whatever you may like} as embellishment.

And there it is! You have beautiful, fast & easy Dahlia flowers to decorate your projects!
I prefer to use double sided papers that are patterned on one and full colored on the other side, as it makes it more effective. Sometimes with double patterned paper when you fold the petals it can look little too messy as you wouldn't be able to see the layers.
So, I hope somebody found this tutorial helpful and will try to make their own Dahlias.
Wish you all nice lazy Sunday.
Stay creative!
No comments:
Post a Comment